Saturday, March 25, 2017

Tutorial: Cameo3 Dust Cover


I finally managed to check Cameo3 dust cover off my to do list. I made mine from unbleached cotton drill and cut out some scrap HTV to decorate. It’s quite simple to make and here’s the tutorial if you want to make one for your Cameo.

You need:
3/4 yard or 3/4 meter of fabric
sewing machine
serger (optional)

Instructions:

From the fabric, cut one piece measuring 23.5” by 18.25”

Then cut 2 side panels. The template can be downloaded here. If you want to cut out the template, the studio3 file is here.Print in actual size. Use the 1” square for sizing gauge.


Line the short edge (front) of the side panel to the short edge of the main panel as shown in the picture below.


Mark 0.5” from the edge.


It should look like this:


Fold the side panel fabric where the marking is and snip the material. Be careful you don’t want to snip more than necessary. This snip will make pivoting the material easier later.


Once you’ve snipped it, it would look like this:


With 0.5 seam allowance, start stitching from the bottom until u reach the mark. Stop with the needle in the down position.


 Pivot the top material (side panel) so that the edge is lined parallel to the foot. At the same time, pivot the bottom material (main panel) so it’s in line with the top material.


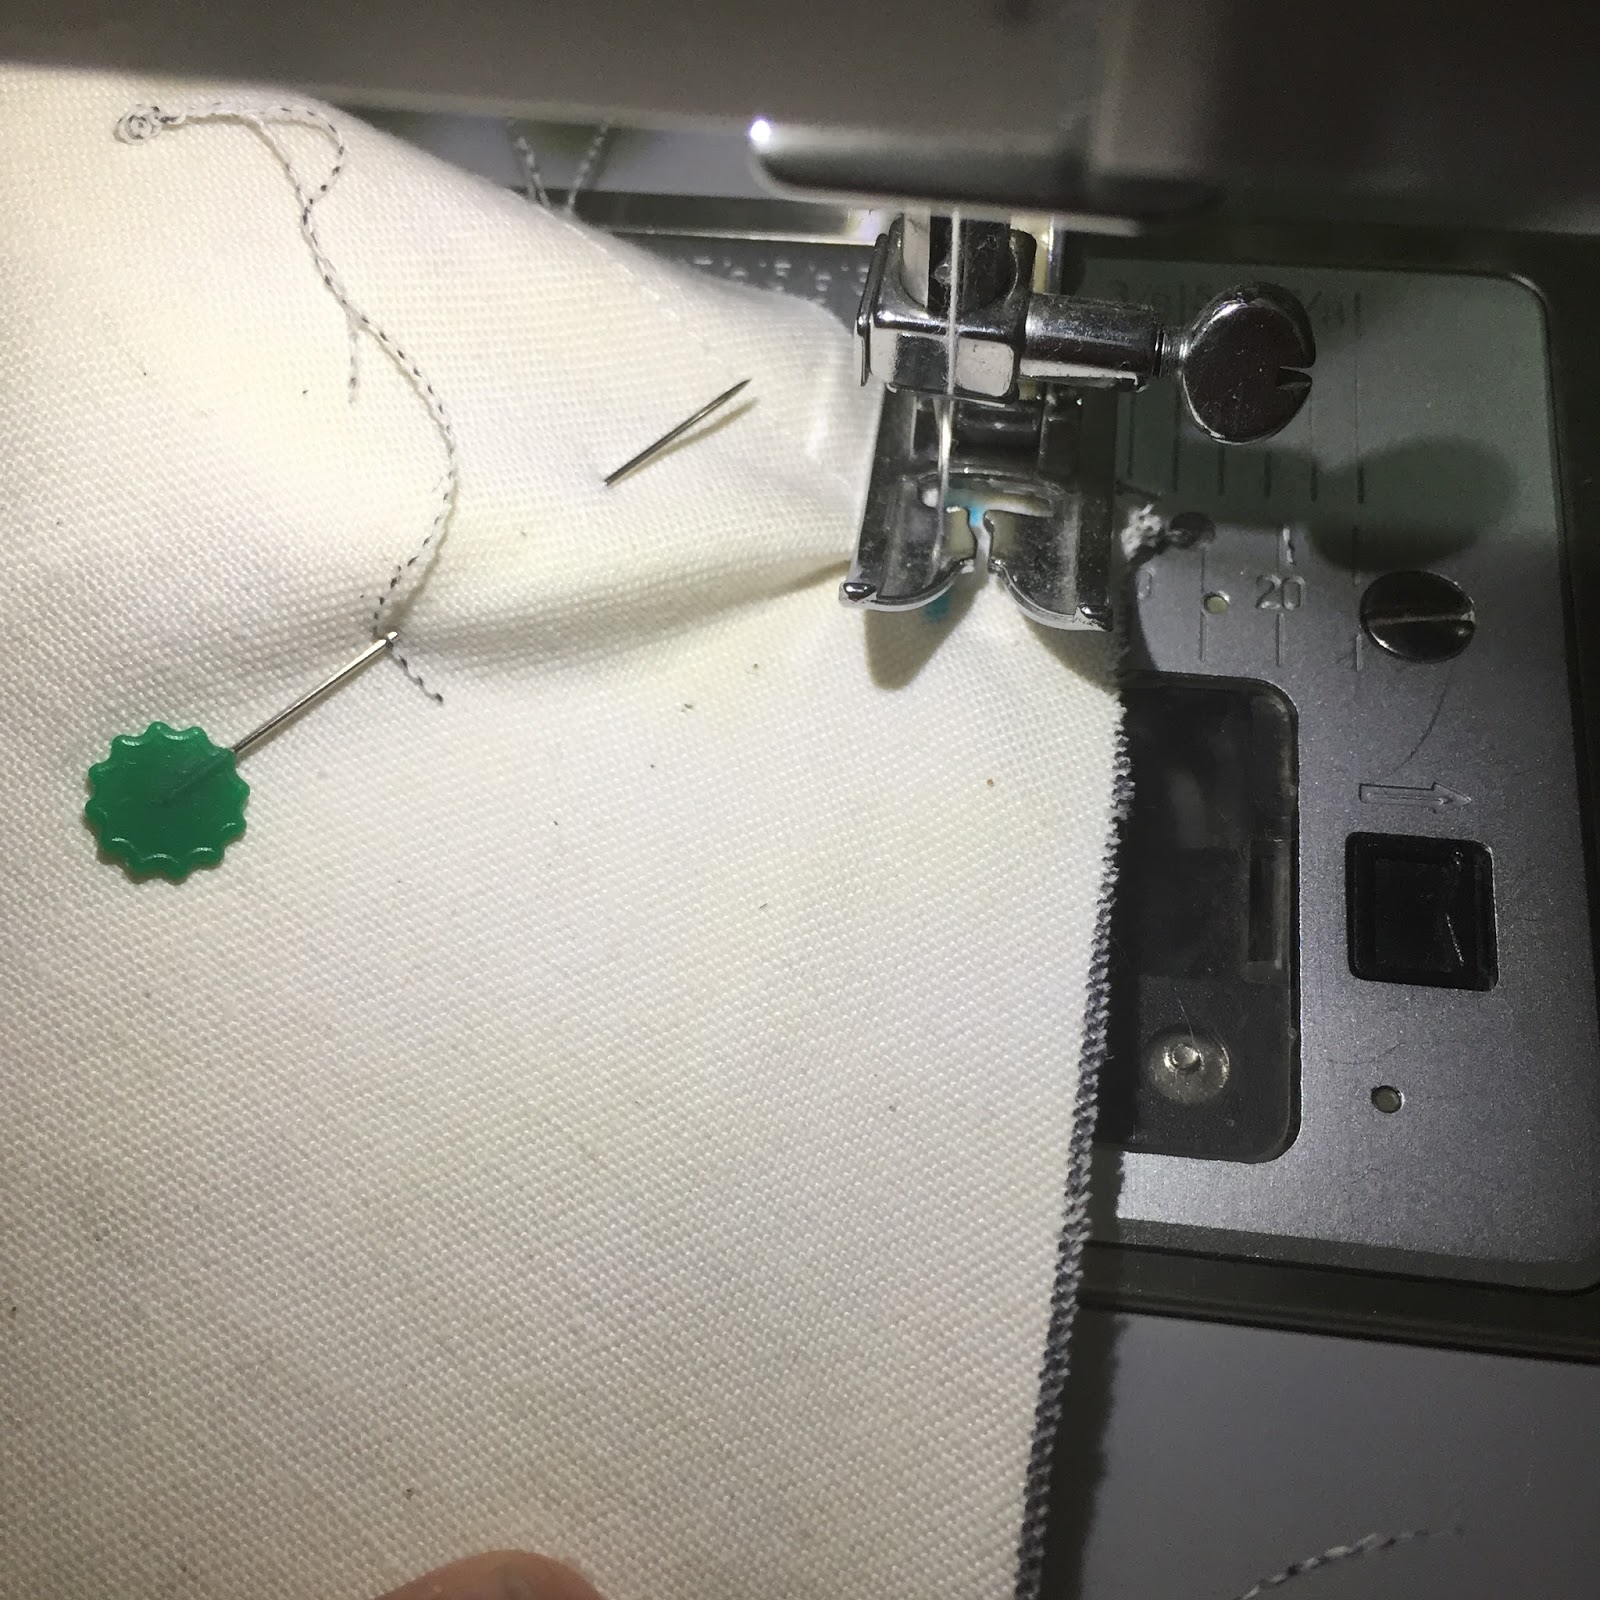
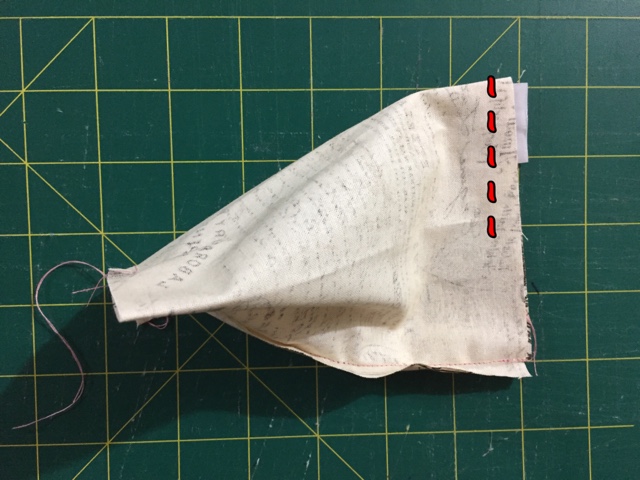
The top part of the side panel is curved, so line both material and stitch them together; adjusting the back material to the curve. Continue until you reach the other 0.5” mark from the edge. Stop with the needle in down position and do the pivoting again.


 Continue down the side panel until you reach the edge and reverse stitch.


This is how it would look like. Repeat with the other side panel. IMPORTANT: make sure you check and double check that the side panels both face the same direction


I serged the seam:


I serged the bottom of the dust cover too:


On the wrong side, I fold in the edge 0.5” and pin it all around.


and stitch around the bottom of the dust cover. That’s it. Press and you have yourself a brand new dust cover.


 I made mine with unbleached cotton drill. You can dye the cover any colour you want or embellish it with applique or HTV like I did mine.


I even made the packaging for my dust covers with the sketch and cut function.

I hope the instructions are clear and easy to follow. Just drop me a line if you need any clarification. If you don’t sew, I can sew them for you. The introductory price is RM20. Please bear in mind that this pattern fits Cameo3. From what I heard Cameo3 is slightly bigger than its predecessors.

Next: Tutorial for Portrait Dust Cover

Monday, March 13, 2017

Cameo Tutorials on Youtube

Now that I am a non-exclusive distributor for Cameo and Portrait, I’ve been doing a few tutorial videos to help new Cameo/Portrait owners with their projects. You can check out my Youtube channel here. If you do check out my channel, I appreciate if you can click on “thumb up” and “subscribe”.  I’m still tweaking and feeling my way about in Youtube so bear with me.

Here is one to guide the new owners on how to register their Silhouette so they get the complimentary one month subscription worth USD25. That’s a lot of money in MYR


This is how I use Embrilliance software to create a cut file on Silhouette Design Studio for applique.


This is a video on pen holder/adapter. It’s included in the Cameo3 Crafter’s Bundle.


This is a tutorial for Etching Cream. 


Cutting Felt with Cameo:


Cutting a plastic sheet for a clutch template:


A sketch pen hack. How to make sketch pen fonts from normal fonts. I did this in English as it was requested by the group members of Silhouette Cameo Project Inspiration in Facebook after I showed them a video of my faux chalkboard writing on black card stock.


I’ll be adding more videos to my Youtube in the future. As most of my videos are intended for local viewers, the medium of delivery is Manglish (Malay and English combination). I plan to add English subtitle to my videos.

If you want me to do a demo video about cameo, let me know and I see if I can work something out.

By the way, did I tell you that my Portrait has a new friend? Yep, I got myself a Cameo3 last February. After all, I need it for class. There’s a new set of ball game especially with the dual carriage and the automatic blade. Love it!


What Happened To February?

Time flies! I put off my blog entry only to realised that it’s already March. Gosh! What happened in Fabruary? Well, I wasn’t feeling so good health wise and long story short, after 43 years of life, I now am on BP medications. Well, life goes on. 

On to the more interesting things. My first Baby Announcement Pillow order for the year. I am now doing the embroidery onto cotton drill material. It’s sturdier and takes on the embroidery well; less puckering. To order, drop me a line at rozirahman@gmail.com or whatsapp me: 0122038117. The price is RM45.00 for a non removable cover pillow and RM65.00 for a separate cover and insert.


I’ve been using Silhouette Portrait for almost 2 years now and have been under the radar. Then one day, Zila Kasim asked me about Cameo and I gave her my opinion. She went and got herself one and asked me to come over and teach her. I am always happy to share with a fellow crafter and we had a pleasant afternoon discovering the Cameo3.

Immediately Zila asked if I would like to do a demo because she sees the potential of Cameo3 for the crafters. I jumped at the idea and we arranged a collaboration for a Demo Party to be held at her studio, LamanSeniZilaKasim.

There was a decent turn out and we had fun. Gathering with like minded people is alway refreshing.
Here’s a group photo of almost everybody. Some left earlier.


The Cameo3 and Portrait was very well received and I’ve taken the initiative to become a non exclusive distributor for Silhouette Malaysia. I’ve also managed to get a Kutu group going for both Cameo3 and Portrait. More info and updates on my Instagram and Facebook page: madebyrozirahman.


I was at Spotlight The Mines on 18-19 February, helping out with the Super Sewing Weekend. I made some simple hand puppet sample for the sewing challenge. The templates are from here.


This is the picture of the lucky winner whose baby I helped pacify when he was screaming his head off while mommy trying to sew a hand puppet. Love having that brief moment with a baby again, even it’s someone else’s baby.


I started to collaborate with a very creative friend who makes hantaran for engagements and weddings. My contribution is the card tag on the hantaran :) If you’re interested in her work, check out her instagram: ryta_khan. This talented lady does flower arrangements and fabulous cakes too. 


Did my combo class at The Craftsical on 25 February 2015. Nieza’s hero modelling a custom t’shirt made with HTV and my telekung student with her telekung. 


 Arwen got invited to a classmate birthday party on a week night. The invitation was broadcasted by her class teacher and I made a quick birthday present for her friend. A simple cotton drill bag (unlined) with personalisation of her name with HTV. A small note from the giver on the inside of the bag. I do take orders for customisation. A simple bag like this would start at RM25.00. Drop me a line if you wish to order.


So, that pretty much wrap up my February. I now find a renewed reason to keep my blog active. As I age, I find keeping records help my failing memory. I will keep on archiving my activities here in the blog for my personal reference. I’m glad if you finds my blog read-worthy. I don’t get much of a response from my blog so I won’t know if anybody actually do read them. 


Tuesday, January 10, 2017

Classes in January

I am working on my various layouts in my bullet journal and decided to take a snap shot of my January calendar and do a quick announcement on my social media for my classes.

I have been doing regular biweekly classes at Spotlight The Mines since last year. I have some regular knitters who come and knit and welcome new ones to join us. I also conduct basic sewing class. My classes run concurrently between 10.30-12.30. So, if you want to pick up a new hobby, why not try knitting with me? 

Another class that is happening this Saturday is Personalized T'shirt Workshop where I will be showing participants how to use the Silhouette cutter to cut heat transfer vinyl. There is still seats available if you are interested. Advanced booking is required as I need to get the t'shirts.


Thursday, January 5, 2017

Unboxing Dream Journal by Paperdorable

This is a long overdue video. I received a Dream Journal by Paperdorable with compliments from Helmi Razali from Paperdorable months ago last year. I didn’t want to use it mid year so I decided to keep it for 2017. I’m actually off to a sluggish start in the new year because my son was down with viral fever the past few days. He seems to have recovered slightly and decided to go to school today. Then only I can work on my unboxing video. 

I had a tough time setting up my camera for the video because the weather is gloomy outside and I don’t get enough light to come in.  This is my first time doing an unboxing video and I tell you A LOT of things happen behind the scene to make a decent video. I have a renewed respect and admiration to the crafters and artisans who does how to videos and the likes. 

I used imovie to edit and record my voice for the voiceover. At first I thought I could wing it by going off the cuff but I ended up with ummms and ermmmmsss that I ended with a simple text so I can read from it. Another renewed respect and admiration to life tv hosts and stand up comedians. I have but no choice but to stick to my day job.

Anyway, as mentioned in the video. I am super loving the Dream Journal from Paperdorable. It looks and feels so posh with the leather exterior cover and the gold hot stamping details. There’s also a pocket at the back of the journal which is a plus in my book. I opted for the Cherry Red journal and dotted pages. The other colour is Charcoal Black and other options for the pages are lined or gridded. I can’t wait to start journalling in this notebook. I plan to do a review video of the journal once I have my layouts done so stay tuned.  In the meanwhile, here is the video, enjoy!


p/s: Do check out Paperdorable website for more offers and beautiful selections of notebooks and planners.

Tuesday, January 3, 2017

First Day Of School 2017

Today is the first day of school and only little missy is going to school. Big brother runs a high temperature so I got him to take some medication and go back to bed. 

Here's our customary first day of school photo:
Everything except for her hijab, socks and shoes were from last year. I think we can stretch one more year out of that penifore. I made her hijab last night and finished 2 more today. 

I posted a quick video on how I finish her hijab with twin needles on instagram along with 3 tips. Check out my IG @madebyrozirahman to find out what the tips are.

The other new thing to school for little missy is her schoolbag. I promised her a new backpack this year as her old backpack was one she used since kindy. Incorporating all her favorite things: PINK, FROZEN and GLITTER, i wrestled up this bag on my Brother NV900. 


The pink material is denim. I used flexfoam from Legacy Creation to line the back and the base of the bag. Love how it holds the structure of the bag. Elsa image was printed on a printable heat transfer material and Arwen's name is cut from glitter heat transfer vinyl. 

I took the path less travelled and added corded binding to the bag. Love how it turned out. 

So how was the first day of school turned out for you?


Phone Pillow Tutorial


I made this phone rest aka phone pillow for a bazaar recently. However the sale was not so hot so I had a lot of ready made stocks. Luckily, my cousin bought the whole lot plus some more as gifts. That's my new year egg breaker. In case you are wondering, when I was in sales many years ago, my boss refers to the number zero as an egg. So, when any of our salesteam brings in the first sale, it means we've broken the egg, get it? Nevermind...

Anyway, since I have to make a few more to make up the order, I decided to take some photos and do a tutorial. This also serves as my reference source as I am really bad at keeping physical notes. OK, here goes:

Cut a rectangular piece measuring 8.5" by 6"

Fold the fabric together and sew a line down the short side (6" side) with a quarter inch seam.

Finger press the seam open. Position it so that the seam is in the centre and sew another stitch line on one side and leave an opening to turn later.

Turn your work onto the other side and now position the first seam line at the bottom and stitch pependicular to it leaving an opening to stuff it later.

Turn your work right side out and poke out all the corners. With the first seam facing down on the cutting mat, mark 1" and 1.5" from the edge and sew 2 parallel lines on ghat marking.

Stuff the 1" shell with fiber fill and hand stitch it close.

Stuff the other end of the shell and you will see how the piramid is taking shape. I add a few spoonfuls of fine pebbles for some weight. By the way, isn't the multicolour grain cute? Hand stitch the opening close and there you have it! Easy peasy lemon squeezy. 


I hope the instructions and pictures are clear enough. Do tag me on instagram (@madebyrozirahman) if you do make one following my tutorial. Good luck!

Nuffnang