Friday, February 17, 2012

February bazaar: Little Red Market


Made by Rozi Rahman will be making it debut at Little Red Market happening on Saturday, 25th February 2012 at 32, Jalan Beka, Bukit Damansara. I’m so looking forward to this bazaar and I’ve been working on some items for sale on that day. Here are some I’ve prepared so far:

Pin cushions


Mug rugs. This is one that I just finished earlier today. Love scrappy crazy quilts

Laminated baby bibs

Chalk mats


Key fobs


Bag tags

DSLR Camera strap covers


Pacifier clips

and God knows what else I can churn out of my sewing machine. I have just over a week to go for the market. Oh, I’ll be making scrappy key chains too:


I sell this for RM3.00 a piece but FREE with any purchase. It’s available while stock last.

So, please come and show some love :)

You can follow Little Red Market at their Facebook page here.


Sunday, February 12, 2012

DIY Dyed Buttons


I was in Jalan Pudu getting some craft supplies and bumped into the famous Zila Kasim of Zila Kasim  Quilt Shop. We went to another shop where they sell buttons and ribbons. Zila suggested that I dye some cute buttons and without thinking too much I bought the buttons and 3 dyes; Cerise, Madonna Blue and Emerald Green. Zila said use dark colours. The outcome is much better than the lighter ones.

So, as soon as I got home from my craft supply hunting and a short stop at Secret Market at MIA, Jalan Ampang, I got my old enamel pot out and boil some water, added the dye in and a dash of vinegar and salt. When the concoction is bubbling, i turn down the flame and toss the buttons in. I let is simmer for 10 minutes or so. Then, i drain the dye and put the buttons under a running tap until the water runs clear. Drain the excess water and dump them onto a clean towel to dry.

The top picture is a teddy shaped button and the one down here is a birdie shaped button in 3 colours. It’s so easy to make that I’m going to make some more :)


I’m selling these if any of you are interested at RM5 for a dozen pieces (12). It can be an assortment or in one colour. Send me an email if you are interested in these :) Check out my facebook page for more pictures of these buttons.

My eternal thanks to Zila Kasim for nudging me to do this. I’m hooked!

Thursday, February 9, 2012

Scrappy Heart Mug Rug and a bit about photography


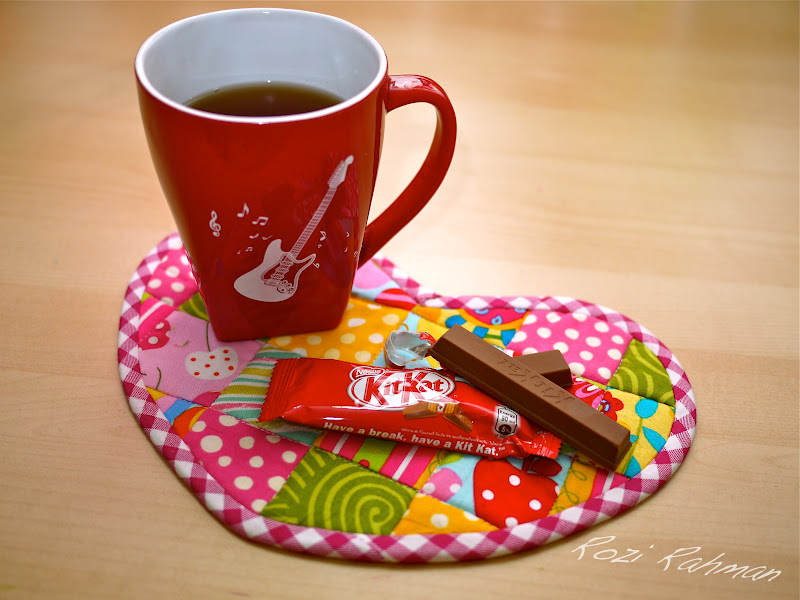
I made this scrappy heart mug rug last night. I love my scraps too much to throw them away and keep even the smallest piece that they got out of control. So in attempt to tame my unruly scraps, I made this quick scrap busting project last night and made another one this morning. It’s super fast. The blocks are 2.25” squares with 0.25” seam allowance. The mug rug finished approximately 9” wide by 7” height. 


Recently, in one of my Facebook craft group, there was a discussion about how a good photo makes an impact especially for online craft business. Needless to say, it’s the only form of communication to the potential buyers other than what other information that you provide in text form. 

I for one, pay a great deal for my photos. I’ve come a long way from photos taken from my handphone and uploaded here (yes, this same blog) to my current pictures. I learned a lot too. I love reading from blogs with great pictures, namely, lbg studio, Randomness by Petchy, Made by Rae, Made, and lots more. When i started blogging, I admired Maya and Zura Lovemelots for their photos, not just their crafts. I get inspired to make my pictures as good as theirs. Here are of my how tos on taking pictures:

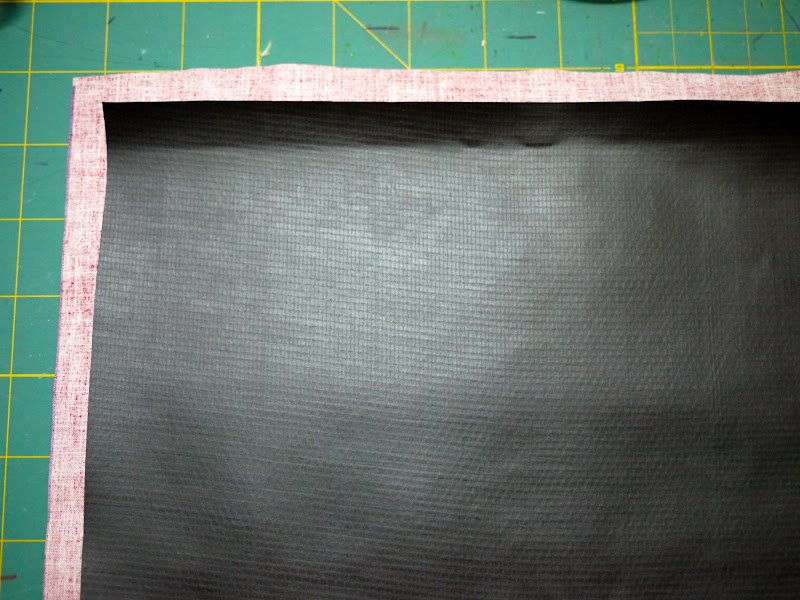
Gone were the days that I took one shot and expect it to be a perfect shot. I took several shots at different angles. Don’t worry about shutter count. Most of us are using digital cameras now so, if you don’t like a shot, you can just delete it later. Here are some of my shots before I get to my favorite shot:

First shot: no flash. It was early in the morning. The sun is not out yet. The source of light is the florescent light on the opposite wall. 

With flash on. Too harsh

I tilted the flash on my GF2 so it bounced off the wall to create a warmer, more natural tone. 

Post editing is optional. Minor touch ups to straighten the picture, enhanced contrast, saturation, highlights and reduced shadows. I did this all in Iphoto. No fancy software. I only used Photoshop Elements 9.0 to add my watermark. I used to spend hours on editing alone but I’ve mellowed and followed my brother’s words of advice, ‘Simply photography, not simply photoshop’. Less is more.

I do believe post-editing is important. It’s like make up. You can do without but you’d look much better with a touch of lipgloss and some powder on your nose, don’t you agree?

My tips:
1. go for natural light as much as possible but if you can’t get any, don’t fret. work within your limitations. I shoot at all hours of the day, day or night. I work with artificial light. Don’t get intimidated with flash. Make it your friend. Work with it. Learn how to handle it, Bounce it off the wall or diffuse it. 

2. Composition and angle. I believe this is a learned art. You don’t have to be gifted to be able to take reasonable nice photos. Have fun with it. Experiment from different angles, different perspective. Don’t just take straight shots. You might be pleasantly surprised to see the results. Add props and different backgrounds to highlight your product. 

3. Post Editing. I think I’ve covered that.

4. It’s a learning process. Practice makes perfect. Keep on learning. Take out your camera and take pictures. Lots of them. Learn about your camera and what it can do. Don’t just go on Auto mode.

I’m in the mood for more of these mug rugs. I might just add a tutorial for it. Till then, take a break, have a KitKat  :) 


Monday, February 6, 2012

Tutorial: Chalk Mat ver 1.1

I’m preparing some items for sale for my upcoming bazaar and made these today. They are chalk mat ver 1.1. The ver 1.0 is finished with bias tape on the edges. It’s nice but it gets dirty from the chalk dust. So the newer version, I took out the bias tape. Here’s the how to:

 Materials:
Oil cloth or laminated cotton measuring 13”x 16”
A scrap piece approximately 5” x 6” for the chalk pocket
Chalk cloth measuring 12” x 15”
Ribbon. I cut mine about 20” long


This is my machine setting:


Take the scrap piece for the pocket. Fold about 1/2” in and stitch. I used a zigzag stitch with the above setting.


Here’s how it looks like when finished.

The right side:

Fold the pocket piece into two and stich along the bottom of the piece (opposite the zigzag stitch made earlier)

Like this:

Turn right side out and keep it aside for later.

Lay the oilcloth right side down. Layer the chalk mat wrong sides together like this. You will have about 1/2” allowance as the oil cloth is larger than the chalk mat.

Fold in the long sides like this:

And stitch. You can you straight stitch. I used zigzag stitch. Repeat the process on the other long side.

Fold in the corner like this and pin in place:


Slip in the pocket about 1.5” to 2” from the bottom and pin in place. Stitch. Repeat on the opposite side.

Turn the chalk cloth on the right side. Mark the centre of the short side. Place the ribbon in the centre and stitch.

I went over it 3 times.

I finished the ribbon ends with fray check. Alternatively you can heat set it.
 
Stick a couple of chalks inside the pocket and TADAAA! you got yourself a chalk mat.

I hope the instructions are clear enough. Good luck and have fun with your chalk mats :)


Nuffnang