I made this phone rest aka phone pillow for a bazaar recently. However the sale was not so hot so I had a lot of ready made stocks. Luckily, my cousin bought the whole lot plus some more as gifts. That's my new year egg breaker. In case you are wondering, when I was in sales many years ago, my boss refers to the number zero as an egg. So, when any of our salesteam brings in the first sale, it means we've broken the egg, get it? Nevermind...
Anyway, since I have to make a few more to make up the order, I decided to take some photos and do a tutorial. This also serves as my reference source as I am really bad at keeping physical notes. OK, here goes:
Cut a rectangular piece measuring 8.5" by 6"
Fold the fabric together and sew a line down the short side (6" side) with a quarter inch seam.
Finger press the seam open. Position it so that the seam is in the centre and sew another stitch line on one side and leave an opening to turn later.
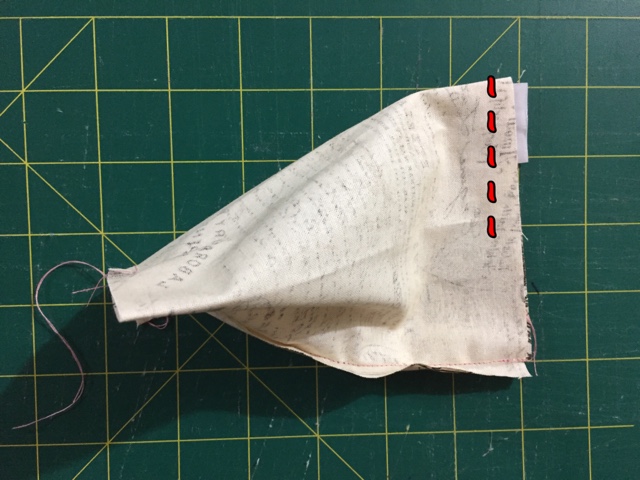
Turn your work onto the other side and now position the first seam line at the bottom and stitch pependicular to it leaving an opening to stuff it later.
Turn your work right side out and poke out all the corners. With the first seam facing down on the cutting mat, mark 1" and 1.5" from the edge and sew 2 parallel lines on ghat marking.
Stuff the 1" shell with fiber fill and hand stitch it close.
Stuff the other end of the shell and you will see how the piramid is taking shape. I add a few spoonfuls of fine pebbles for some weight. By the way, isn't the multicolour grain cute? Hand stitch the opening close and there you have it! Easy peasy lemon squeezy.
I hope the instructions and pictures are clear enough. Do tag me on instagram (@madebyrozirahman) if you do make one following my tutorial. Good luck!


No comments:
Post a Comment